For the last year I have been researching and considering a fairing for my LWB Burley recumbent bicycle. Fairings, by design, are supposed to give you a little more mph and less wind resistance. Articles and forums I have read say you really don’t see much improvement unless you are doing 15 mph, BUT anytime you are heading into the wind, there is a noticeable increase from no fairing at all.
Burley stopped making recumbents about five years ago so precise fitting accessories are often hard to come by, even replacement parts can be difficult to find. Both Windrap and Zzipper had fairings that would work, but the cost would be $300-$500, way more than I wanted to spend. As luck would have it I came into position of a Zzipper fairing, scratched but usable, but without any hardware. I think it is actually for a trike, but I was determined to make it work. A day of researching brought me to the conclusion that about the only way to attached these is to mount a upper and lower bar to the front of the bike that holds the fairing in place. Frustrating, to say the least, as mounting kits at Zzipper were as much as $500 and about $100 less at Windwrap.
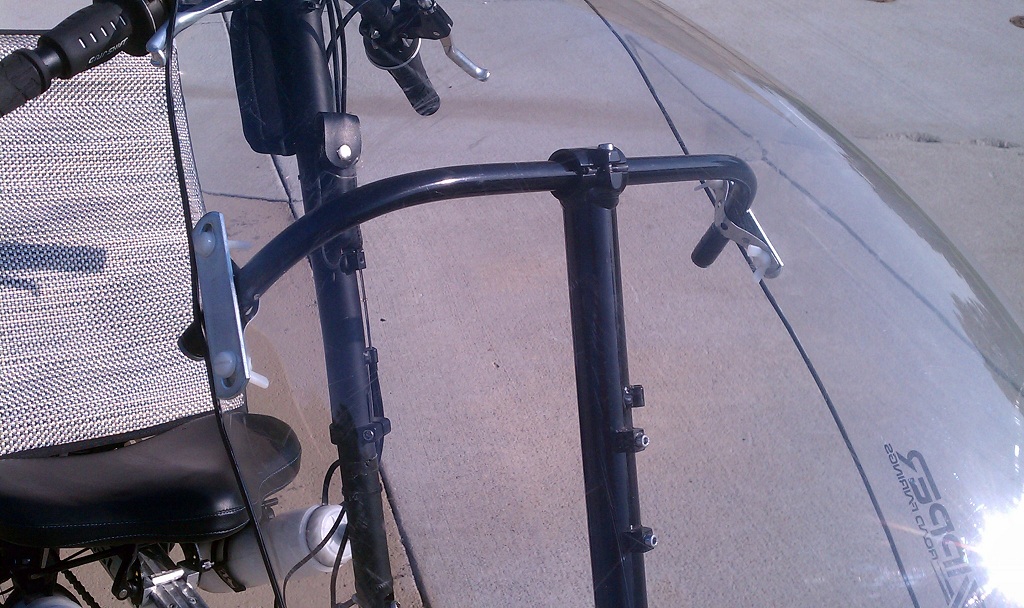
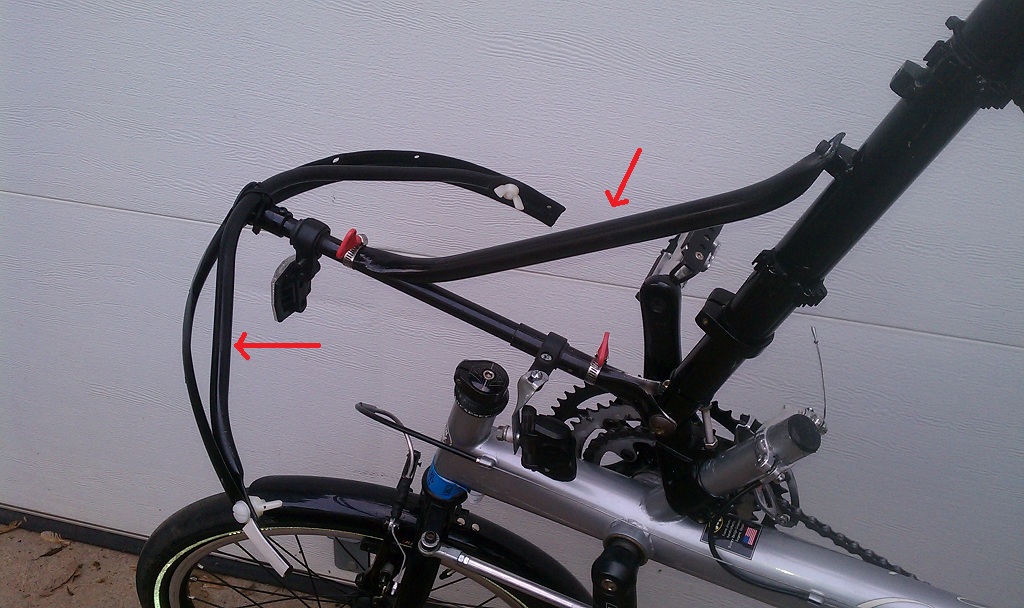
With a few years experience rebuilding two vintage VW’s, a little skill with a grinder and a rivet gun, I decided I could probably build the same or better mounting hardware myself. I first took stock of my current bike design and what parts and scraps I had on hand. As luck would have it I had an old steering mast that I could attach the the front steering hub which acts as my main support for the entire fairing. Where the handle bars were suppose to go on my steering mast, I used a piece of tubular aluminum deck railing.
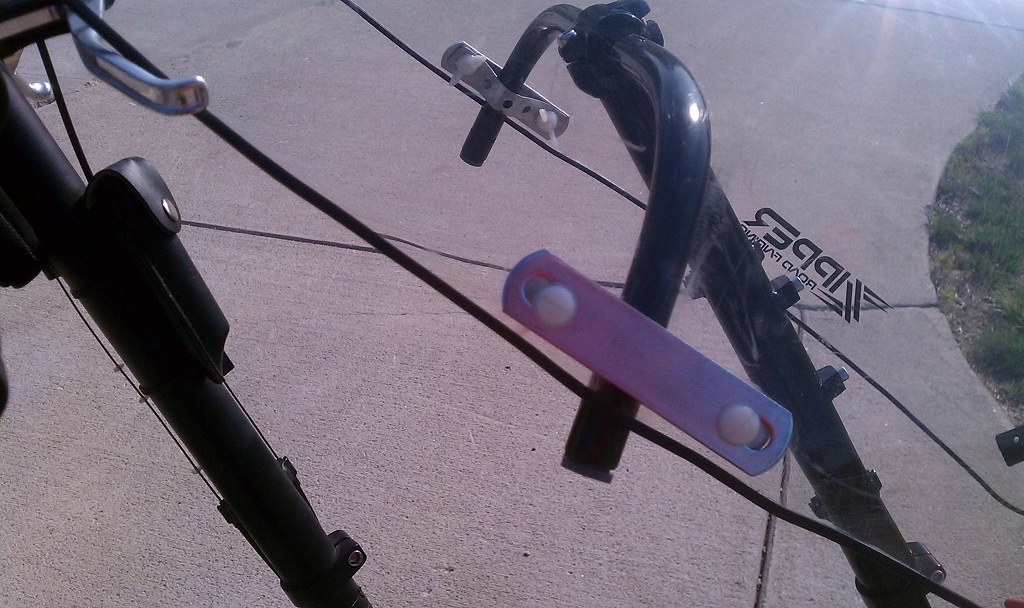
The upper bracket was bent using a conduit bender. The diameter was too small for the steering mast bracket, so I took an old inner-tube, cut it into a strip and rolled it around the top bar until it was big enough to be held in the mast bracket. The brackets that hold the fairing to the bar are made from pieces I found at my local Mennards home improvement store (like a Lowes).
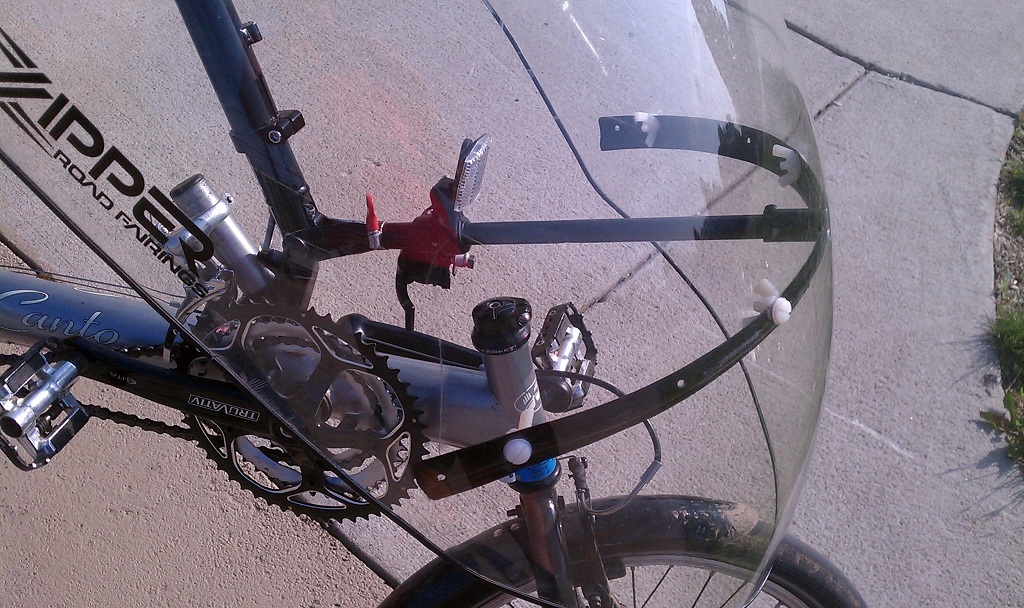
Examining how the lower front of the fairings are attached I found a large metal ring, the bottom of a barrel and cut it to fit, then riveted it to the fairing using a black metal curtain rod. Getting this to attach securely to the bottom of the steering mast was the greatest challenge, but finally I came up with following using an aluminum tube that is meant to be a deck rail (same as I used on top fairing support bar). Where it attaches to the steering mast I cut the tube down the middle, carefully split it apart and mounted it to the two bolts on each side of the steering mast.
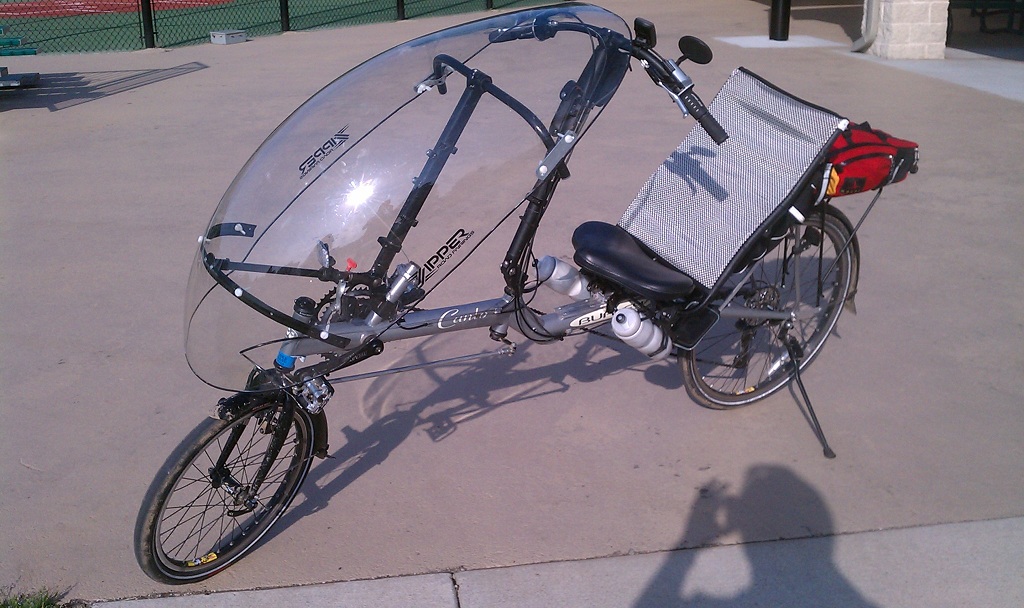
Nylon wing nuts from Lowes and bolts from Mennards (they had a wider head) were used to mount all brackets to the existing holes in the fairing. Once I tested it and made final adjustments I disassembled and spray painted everything a gloss black. Here is the final view showing the entire bike.
The first time I took the bike out with the fairing I was not impressed as I thought I was feeling the same type of riding against the headwind and no difference in performance. That, I discovered, was wrong as my first ride was without my speedometer. Once I put my speedometer on I was amazed at how much faster I was going, especially into the wind. As an added benefit, I found it works as a sail with a tailwind. However, on my ride today with 22 mph winds and gusts of 40 mph, it was quite a challenge when I was hit by a side wind.
Overall, though, I’m extremely happy with the results and doubt I will ever ride a recumbent again without a fairing. I’m anxious to see how it does on my ride across Nebraska (BRAN) next week.
Additional Notes Added June 3:
After many test runs I determined that my support system for the faring was a bit wobbly and created a rattling of the fairing, especially on the lower outer area. Last night I designed a couple of tubular support bars which I hope will help. This will keep the outer edges of the fairing from bouncing in and keep the whole fairing from bouncing up and down (which was only slight before, but noticable).
The challenge of staying hydrated while cycling is to keep ahead of it and I’ve often heard, “drink before you are thirsty”, which is so true. Also, if you drinking enough you will be making bathroom stops during the day. If you are not, you may be running the risk of dehydration. Only once did I run the risk of dehydration on a long, very hot ride. I thought when I took off that I had two bottles of water and found out somehow I only had one. Thank goodness it was a SAG supported ride and water came to my rescue.
The hard part of staying hydrated is forcing yourself to drink. So, making drinking easy, accessible and enjoyable is a key factor. Having water bottles within easy reach during your ride, or using water bladder system is the most popular.
For my recumbent the bottle holders are on the back of the seat and really impossible to reach during a ride, so I designed my own bottle holder system under the seat of my recumbent using special clip on bottle holders.
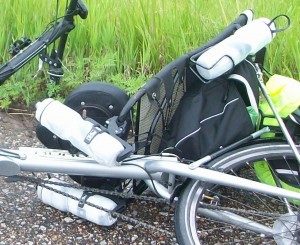
Water bottle position under seat of recumbent bike and on rear of seat
A general rule is to drink about one bottle of water per hour, but on really hot days I recommend doubling that. Adding something to the water, not only adds much needed carbs, but the flavor helps me down more.
Disposable pill pouchesare about perfect size for the amount needed to flavor my bigger bike bottles. Small snack size ziplock bags work well also. I usually bring a few flavors to add some variety, too.
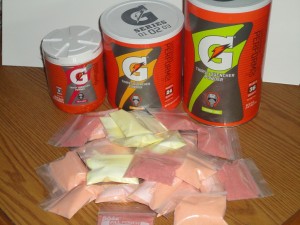
Gatorade size options and my individual serving packages
I’m not really sure how much this is per serving, doing it myself like this, but to give you an example of store prices, the small container above sells for about $4.50 at my local grocery. The medium one I bought for about $8.50 at Walmart (about three flavors available) and the large one I bought for around the same price at Sams Warehouse (only one flavor).
This should not be your only source of carbs, though, on a ride. I also recommend fruit or power bars of some kind.
Last night was the first Taco Ride of the year for me and this year my son Alex joined me. Other son Aric was going to go but we could not get enough trail bikes working and he graciously offered to let Alex go this time.
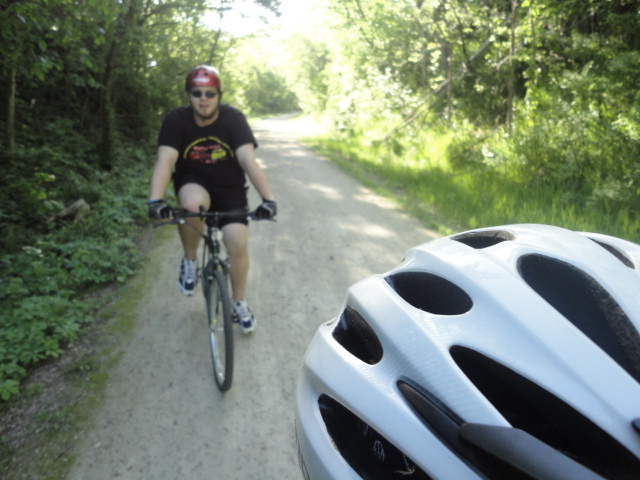
Over the shoulder shot of Alex on his first Taco Ride
Weather was cool, but still warm enough for shorts and short sleeves. We met up with two friends from the Omaha Ski Club, Ben and Ellen and a friend of theirs for the ride. We anticipated a busy night, which it was, as the Blue House band was playing in Mineola that night outside the Mineola Steak House steakhouse. However, we got there early enough to get immediate seating inside where we enjoyed tacos and margaritas for the adults. Food was great and the music was great as well.
We ventured outside after dinner and enjoyed the music about 30 minutes before heading home. It was dark by the time we got back to the parking lot in Council Bluffs (it’s 10 miles each way) and we did need to put jackets on.

Alex and I outside the Mineola Steak House enjoying the music of the Blue House Band
If you have never ridden on the Wabash Trace, it is a real experience, especially at night. A reclaimed railroad line that runs a couple hundred miles, many parts of the trail are canopied by the trees, which is very picturesque but the added benefit of keeping the shaded areas cool in the summer.
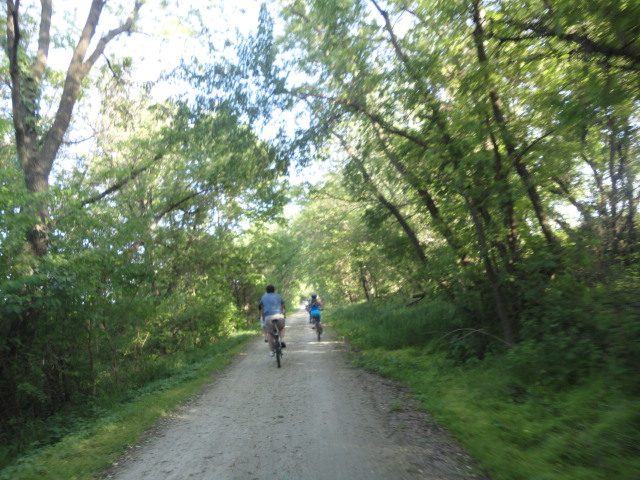
Riders on the Wabash Trace on Taco Ride Night
The big debate, should I reduce weight or reduce drag on my bike, and which will have the biggest impact on performance?
Last year was my first year taking on a long distance, statewide bicycle rides, first doing BRAN, then RAGBRAI. My training had been on mostly flat terrain here in Omaha and I regrettably neglected to consider what impact the daily (hourly) hills of Nebraska and Iowa would do to my riding performance and, quite honestly, my ability to finish the rides (I sagged out 40 miles of BRAN, exhausted and fearful of an accident).
Now, I ride a recumbent and not a light one at that. From the factory it should weigh 33 pounds. I’ve added a rear bike rack, a rack bag, a seat bag, seat struts and two water bottles. Not sure how much my Kevlar tires add to the weight, but every little bit adds up and checking on the scale I came to a shocking 45 pounds. What on earth am I carrying in those bags? Well, for the statewide rides I do one needs to carry nutrition, cold and rainy weather gear, sunscreen, etc.
If I could lose 10 p0unds off the bike I could see a real difference, but that’s not going to happen. Instead, from what I have researched, adding a fairing, even though it adds weight, can have a significant difference. I’ve read on various biking forums this can actually give one 1-3 mph more in speed, but one needs to be doing above 15 mph to see a difference. However, if you are heading into the wind, the mph is less of an issue and one can see big improvements.
This will be my second year riding on the Bike Ride Across Nebraska (BRAN) and after the struggle I had last year I decided to do whatever I can to make the ride easier and more enjoyable. I’m planning to add a fairing to help reduce wind drag, to increase speed and reduce effort.
Keep an eye out for a future post where I show how I make my own custom fairing mount.
Anticipating cooler, wetter weather for my bike ride across Nebraska (BRAN), I’ve been searching for and researching the appropriate recumbent rain gear. My previous rain jacket, which I bought at Sports Authority, was not designed for biking and although it did do a great job of not letting water in, I perspired so much during exertion that I was nearly as wet inside as out. From what I have read on forums and reviews, one needs the jacket to be lightweight, breathable, waterproof and wind resistant as well. Most of these types of jackets are well over $100, but I think I found one by O2 for a fraction of that. It’s the Rainshield O2 cycling rain jacket.
Last year on BRAN I chose not to wear any rain gear below the belt, but quickly found out on a long wet ride that is not a pleasant option. Talk about chaffing! I have a pair of long rain pants, again not for cycling, and have never used them but fear they are going to be way too hot as they are not breathable. This year I’m going to try some breathable waterproof biking shorts I found at Pro Bike Kit (In the UK of all places, but free shipping) . The only downfall with shorts for a recumbent rider is that your leg openings are parallel to the road or higher, so rain will naturally fly into the openings. These shorts, however, are just slightly baggy and extend down a couple inches below the knees. They also have Velcro to keep the leg portions tight. These are not padded bike shorts, but that’s okay as I wear a Andiamo thinly padded bike short liner under all my shorts. Half the price of normal recumbent bike shorts and you can wear any type shorts over top.
And finally found a longer style helmet rain cover from J&G Cyclewear that would fit my helmet with the visor on front. I really like this helmet cover as it is bright yellow, has reflective material on front and back, plus a loop in back to attach a red blinking light for extra visibility.
I’m still not sure what to do about the feet, as I wear Keen bike sandals and socks. I do have some shoe covers I can put on if they get cold, but I doubt much is going to keep the rain out.
It’s just 12 days until BRAN and I am so not ready for this. It’s a real struggle to not let myself talk myself out of this mentally. I’m several hundred miles behind in my training because of the cold and wet Spring we have had. Yeah, yeah, I could have gone out in the cold and rain to put on some miles, but I REALLY don’t enjoy that. Besides, that’s not what we usually get on BRAN. Except, this year has me worried. We are now at the end of May and this blasted weather is still here!
The best thing I’ve found to prepare mentally is to work on the details of planning everything for the trip. I’ve spent the last few weeks getting my recumbent bike all tuned up, including replacing the entire drive train and adding a fairing (wow, what a difference that made). I have managed to get in 300 miles this month, but am about 400 miles behind the training I had put in last year.
I am encouraged though by my physical ability this year. Last Spring I had barely any time in as a new bike rider on my newly purchased recumbent bike and it was not just the physical training involved, but getting used to riding differently. The sprained ankle in April last year did not help either. This year everything feels like a well fitting glove and although I’ve not gone more than 50 miles in one outing, I really do feel confident I can manage a 70 mile day. When people ask how I can ride that far in a day I tell them I really just ride several 15 mile rides in one day. Mentally, 70-90 miles in a day is a depressing thing to look forward to so I tell myself all I need to do is ride to the next SAG stop, where I rest, rehydrate and get some nourishment. Then, it’s simply on to the the next SAG stop. And so on and so on. Before you know it you are at the camp site.
I’ve been collecting parts to do this major overhaul for some time and today, rather than ride in the rain, I decided to do the overhaul on my recumbent that I had been putting off. The crank set I got on ebay and is a match for the original one on my Burley Canto recumbent. The chain and cassette I ordered from one of my favorite recumbent shops, Calhoun Cycle. With the help of several utube videos I figured out how to replace everything and all went well except for the cassette. Somehow I ordered a 7 gear cassette instead of the 8 I needed and I was missing the 11 tooth gear. As it turned out, my old 11 tooth gear was in good shape and removable so I added it to the 7 gear cassette and all seems to work fine.
Replacing the chain was quite a challenge. I was going to use a SRAM super link but found a video that showed how to carefully pull the post out on the chain link, then press it back in so it is all original chain without any link units. Seems to have worked. The one piece of advice I give anyone doing this is take some photos before you start. Otherwise figuring out how it goes through the derailleur is quite a challenge.
My chain had at least 3,000 miles that I put on since buying the bike and I have no idea how much it had from the previous owners. I figured it was time to change the chain and associated crank set and cassette. Riding the bike after it was all done, I could really tell the difference. Examining the old chain against the new chain it was obvious the old one had lots of wear.
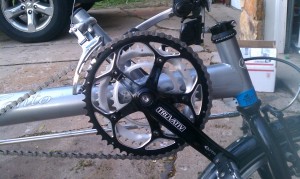
The new crank set, bright and shiny
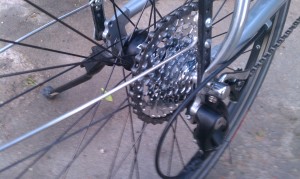
New cassette
I’m signed up for my second year of BRAN, the Bicycle Ride Across Nebraska, and the start date is only 31 days away with no training done on my part. This was a grueling ride last year, partly because I was recovering from a sprained ankle with minimal training, but also I had not trained for hills, nor was I prepared for the lack of sleep from all the bad weather that week. I was exhausted some days before I even started riding. Told myself I would do better this year, but Mother Nature has been very uncooperative this spring in providing good weather for riding. Well, Mother Nature or not, it’s time to get serious about my bike training.
Typically I am told you should not increase your mileage, when training, to more than 10% of what it was the week before. I don’t have that option. I’ve only been out riding a few days and my longest ride was 23 miles, 59 miles for the year. I need to be able to do 60 miles easily for a couple days a week and I need to start riding hills.
It all starts today! I went out and rode 23 miles today, half of that into 25 mph winds (felt like going up a very long hill). I was exhausted but it felt good!
Follow my riding stats here to see if I succeed in getting ready.
